Sonntag, 19. April 2015

Deck - the first layer with plywood


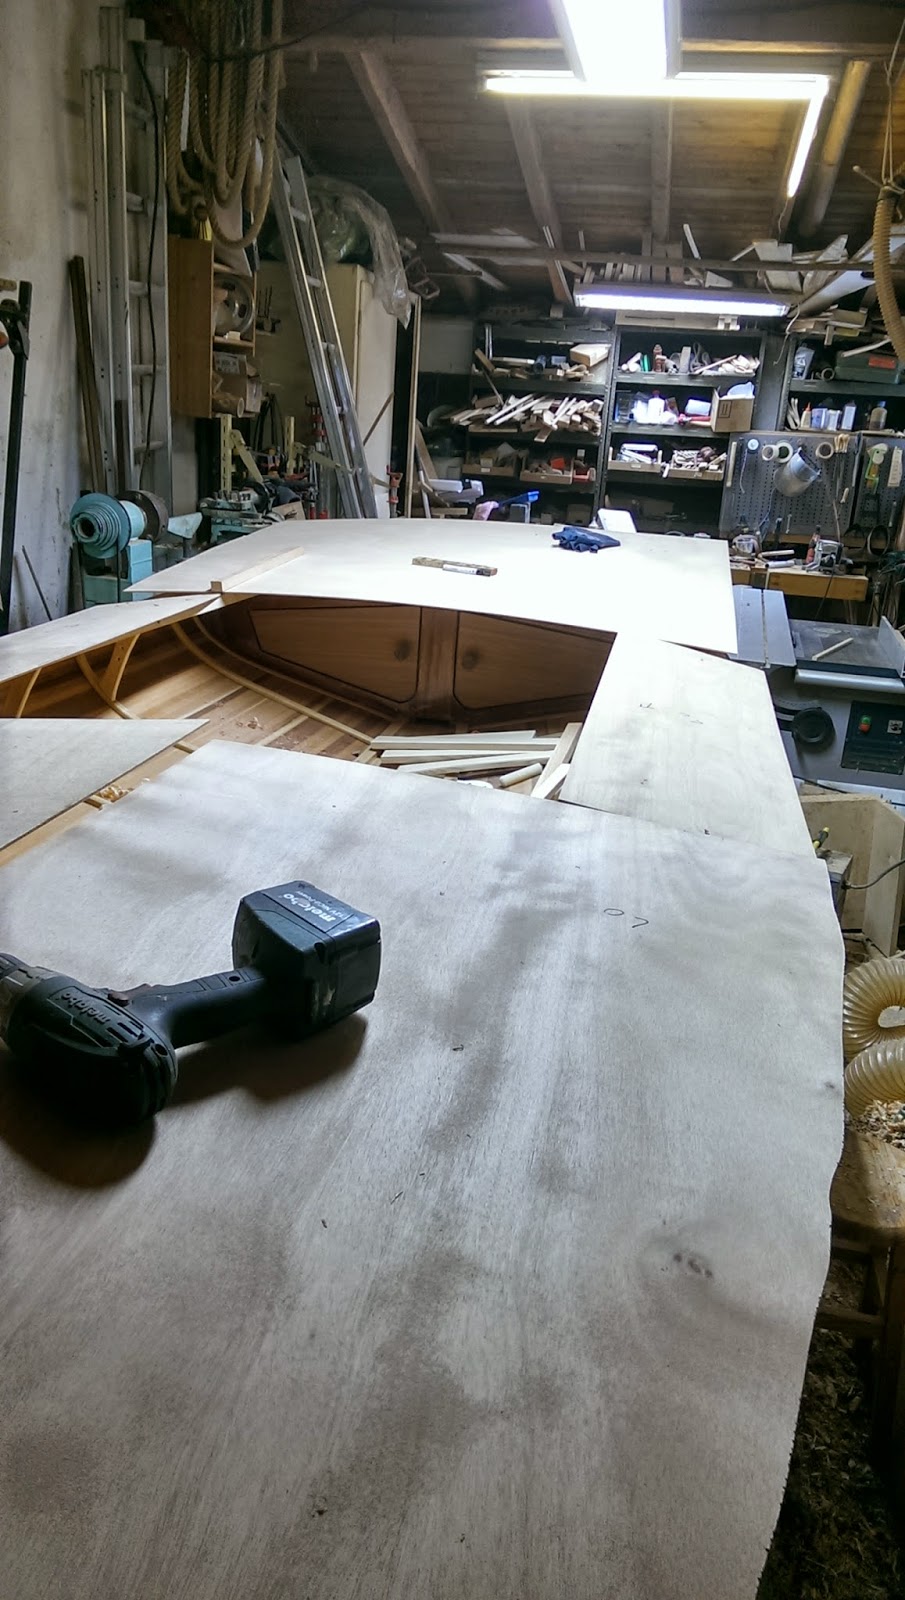
Time for the deck - the first layer is made out of 4 mm marine-grade Okume plywood. This will later be covered with Mahogany planks.
raw cut...

after sealing the inside surface with 2 layers of epoxy

i thought it be a good idea to take the layout of the supporting deck structure to have a "plan"" for future mounting of  deck fittings etc.


careful taping off all non-glue surfaces

plywood deck after glue-up

I simply used screws to keep the deck in place while the thickened epoxy cures. The screws were removed afterwards. I found this the most efficient way to keep the deck in place while ensuring a tight fit on all gluing surfaces. The screw holes dont play a role at all as they will be covered with the top layer anyway.


Mast, boom and sprits


The mast and other spars (sprit, boom and a topmast) should be long-fibre, light and flexible wood. Typically spruce, which is also what I used. My lumber seller had some nice material which had originally been ordered for window and door-frames. This means no knots and quarter-sawn, straight grain orientation.


Planing the halves for the mast


a table router proofed to be a nice help for "hollowing-out" the mast halves to reduce weight

the narrower (following the taper of the mast) carvings were done with the normal router

the 2 halves of the mast glued together


Cutting the tapers on all four sides on the bandsaw


tapered from top to bottom with the biggest diameter at the level of the mast partner. Then the mast tapers again slightly all the way to the mast foot

this little tool with 2 dowels and to cut-off nails helps establish the lines for planing the mast from 4 edges to 8 edges


8 edges, planed with the electric planer and some fine tuning with the hand plane


then all the way via 16 and 32 edges to a (more or less) round shape

cut-outs at the bottom to fit mast into mast foot and keeping the orientation of the mast "locked"

Test fit...

first time outside the workshop. Looks really nice :-)

Mast foot put in place

after varnishing - cutting out foam rubber to go underneath

"doors" for beer storage...


A bit of consideration went into the best closing mechanism for the bulkhead doors. After a number of ideas with hinges, I decided to try out four pairs of Neodym magnets. Works quite well actually. two doors in the bow bulkehead and 2 in the aft should provide for sufficient storage...


A lot of stuff to post...


so, I definitely prefer boat-building to blogging. Quite a lot has happened since the last posting activity, and I will post all of it more or less in one go. That means the dates do not at all reflect actual building intervals but rather summarize the activities.


After the bulkheads received slim frames made from steam-bent ash, the inner surface was sanded with 120 grit and carefully cleaned from all dust.


Sonntag, 28. Dezember 2014

Frames for the Bulkhead hatches, deck support structure finalized

The deck support structure of the aft deck - rough blocks of ash glued and screwed in 
the idea is to create a structure solid and rigid enough to potentially allow mounting an outboard engine (even though this is a sakrileg of course, but you never know) 
on the right hand side there is one additional block to allow for asymmetrical mounting
The deck support structure for the carline within the cockpit area
Pieces of ash, doweled into the frames and screwed from the top through the deckbeams.
This is the first part of the hatches in the bulkheads, the frames

Made from Mahogany as well


And bow kingplank


just to have the complete picture, this piece of 20 mm plywood was glued and screwed
in the very front of the bow for additional strength


Here is the bow king plank dry-fitted in the notches in the deck beams and front bulkhead (this one is made of 20 mm Mahogany marine-grade plywood and glassed with epoxy).

Below the king plank one can see the block for the mast partner (35 mm solid ash)
Jig for the router to achieve a 100% circular cutout for the mast. The jig is just a piece of spruce that was cut out on the lathe.
the router bit with the bearing on the top to follow the jig
the result is a 100% accurate hole for the mast in the king plank and the mast partner block
King plank and mast partner epoxied and screwed in place.

Samstag, 27. Dezember 2014

Stern king plank


Now it is time to work on some of the key elements for rigidity and transferring the power of the sail into the hull - the king planks.


rough cutting the inner stern


Before further planing
Notches in the deck beams and bulkheads
and the inner stern


shaping the stern kingplank to fit the deck coaming